Friday, December 16, 2011
Mrs. Watson's still life
Of course, I won't ask my students to do something that I am not willing to do myself! Here is the still life I made while the students made theirs. This was done on a large sheet of gray paper taped onto the front board. I used crayon, so there was no erasing allowed for me! Fortunately for the students, they got to use pencils... and erasers!
Tuesday, December 13, 2011
Still Life Project
Now that the basic drawing lessons are over, it is time to show off what you've learned! This is the simple still life that is set up in the art room for you. Your assignment, to draw and shade it from your perspective! Everyone's paper will look different, because everyone is looking at it from a different angle. As you work, make sure to look for details (like the reflections in the silver cylinder).
This is my example that is being created on the board as the class works!
This is my example that is being created on the board as the class works!
"I'm no good at drawing."
This is a common phrase that many children will say at one time or another.
My answer is simple.
"Of course your not that good at it, yet! If you were good at everything, you wouldn't need to go to school!"
Children have the mistaken idea that they have to be good at art the first time they try to draw a picture. I try to set them straight by comparing it to learning to play the piano. The first time anyone tries to play the piano, they are guaranteed to make plenty of mistakes, but that seems to be okay because it is expected. Everyone knows that if you want to get better at the piano, you have to practice. Visual art skills work the same way. Of course you will make lots of mistakes at first! That is completely normal! You will get better with practice!
This is true for all of those adults out there who decided sometime before 6th grade that they were "no good at drawing", too! You just need some lessons and lots of practice!
The amount of practice = the amount of success
If you don't practice at all, you'll never get better.
If you practice a little, you'll get a little better.
If you practice A LOT, you will be AMAZING!
If you don't practice at all, you'll never get better.
If you practice a little, you'll get a little better.
If you practice A LOT, you will be AMAZING!
Friday, December 9, 2011
proportion
Proportion means making sure each of the parts are the right size to be correct for the whole. The best way to describe it is to imagine you are drawing a picture of a person. If you were drawing a person, the arms should not be too long or too short. It means making sure the head is not too big or too small for the body. That sort of thing.
In class, each student selected an object out of the still life bins and practiced drawing in proportion. They practiced doing basic comparison measuring to try to get the sizes right. Comparison measuring means that you 'measure' the short side with your fingers, and compare that to the other sides. If the short side counts as 'one', and the long side equals 3 of that 'one', you know to make it 3 times longer than the short side.
To work on this at home, select simple objects in the kitchen to draw. A pot or pan works great!
Thursday, December 8, 2011
Shading a Ball reference photos
Here are some shots of the ball that the students looked at while learning to shade. As you can see, the angle of the light really affects how the shading needs to be done! If you want more practice, you can look at these photos and sketch in the shapes you see created by the effect of light and shadow.
Shading a Ball - Student Examples
Here are some 6th grade examples of shading a sphere. It is fun to look at all the different angles of light and shadow in each picture. This is due to the fact that the ball was placed in the center of the room, with all the students sitting around it. Everyone had a different viewpoint.
Tuesday, December 6, 2011
4th grade - Shading a ball
We started a shading lesson today. Shading involves the Element of VALUE. We also use the Element of SHAPE while working out where the lights and darks in the picture are placed.
I placed a playground ball on the center table in class and illuminated it with a lamp. We talked about using the Element of SHAPE to lightly sketch in the shapes formed by the shadow on the table, the shadows on the ball, and even the dull light bouncing up on the back side of the ball from the table.
Students had an opportunity to walk around the room and see how the shadow shapes change on the ball depending on the angle you are viewing it.
6th grade - Color Wheel HOMEWORK!!!
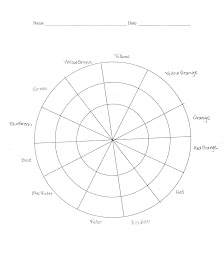
Today I handed out the next homework assignment. It is a color wheel to fill out at home. You can use whatever coloring supplies you have on hand at home.
There are 3 rings on the color wheel. The outer ring should be the colors tinted, the middle ring is the pure hue, and the inner ring is the color shaded.
There are examples below of what it should look like in the 4 most common mediums (art supplies), crayon, colored pencil, markers, and watercolor paints.
If you lose your copy, click on the image and print a new one!
Friday, October 28, 2011
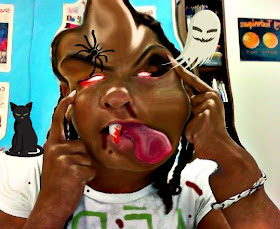
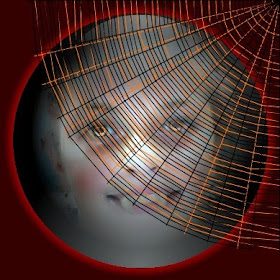
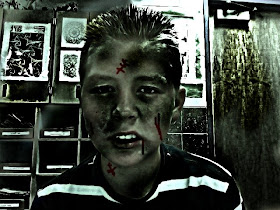
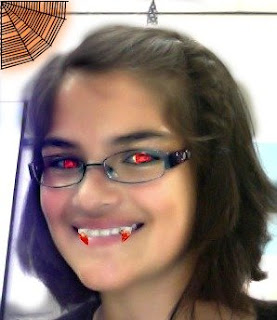
6th grade Halloween Portraits
There is an amazingly fun website called Picnik.com. It is an online photo editing program. There are three levels to it.
- Free play as a guest and upload one photo at a time. The functions are limited but still quite fun.
- Free registered users get to upload 5 photos at a time, but the functions are still limited.
- Premium users pay an annual fee. They can upload and work with up to 100 photos at a time, and all functions and features are unlocked for endless possibilities!
Miss Albaugh's 6th grade class had the opportunity this week to sit down with a class set of Mac iBooks and play with picnik.com. Each student first took a self portrait using a program on the computer called Photo Booth. Then they imported the Photo Booth shot into picnik.com and modified and edited using the most free and basic version to create a HALLOWEEN PORTRAIT! Ah! They had so much fun!
Here are the results!
Notes to other art teachers who may be thinking of doing this project:
- Make sure you know the ins and outs of picnik before setting your students loose in it!
- Spend at least 30 minutes demonstrating all the functions and how to undo. A computer projector works great for this.
- If you can't get a class set of computers brought into your classroom, but can get some computers, set up groups of students in group portraits and let them each edit themselves in the group shot.
- Be aware of your airport's capabilities. We had enough computers for each child, but the airport couldn't support that many online all at once in my classroom, so a few had to share.
- It can be chaotic trying to orchestrate that many students in an online program, especially if there is a wide range of computing abilities in the group.
- In the event that the computer freezes mid edit, you can shut down the web browser and 'restart'. Picnik recognizes and reloads your last permutation.
- Picnik has a wide range of 'save and share' options. Having the students e-mail their final project to me was the easiest way for them to "turn it in".
Saturday, October 15, 2011
4th grade - Guided Apple Assignment
The fourth grade classes followed along on a guided drawing lesson. In this type of lesson, everyone is drawing the same thing, following the teacher's instructions. In this lesson, the students created an apple. The goal of the lesson was to strengthen the students' shading skills, while learning that they can shade in color! Here are some student examples of a shaded apple...


